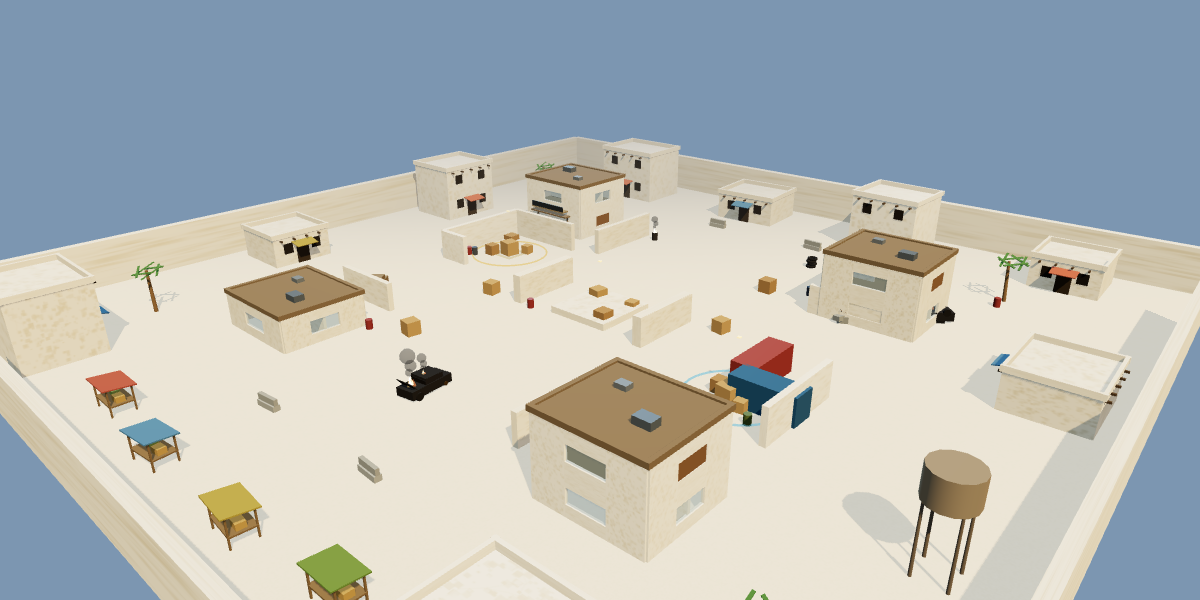
Dust Fort is easy to read from a distance and dangerous to cross without a plan. Its pale walls separate wide exterior sightlines from compact interiors. That contrast makes positioning more important than constant forward movement: every doorway can hide a short-range defender, while every rooftop or open lane can reward a patient rifle.
How to move through Dust Fort
Treat the central opening as information, not an automatic route. Check it early to understand where the opposing side is applying pressure, then decide whether your team should contest, hold or rotate through a protected corridor. Crossing alone gives multiple angles a chance to see you. Crossing behind utility, cover or a teammate narrows the number of fights you must take at once.
The adobe passages are safer from long-range fire but compress movement. Keep enough distance from the player ahead so a single burst or grenade cannot punish the entire group. At exits, clear the nearest corner before searching rooftops. Reversing that order often leaves you exposed to the defender closest to the doorway.
Choose the right range
Rifles are flexible because they can hold the open middle and still enter the interior network. Submachine guns and shotguns gain value when you commit to the narrow route, but they need cover before challenging distant positions. A scoped weapon can discourage rooftop peeks, although remaining scoped for too long makes a close flank difficult to hear and answer.
Team Deathmatch priorities
Respawns shift the front line quickly. Do not assume an area stays safe because your team cleared it moments ago. Watch the minimap, identify where teammates are concentrated and cover the route that prevents the group from being surrounded. When your side controls the center, resist pushing every exit simultaneously; holding two connected pieces of cover often produces cleaner fights than chasing a retreating opponent into unknown space.
If your team loses the middle, regroup behind a corridor exit and trade together. Dust Fort offers enough alternate paths to recover without repeatedly feeding the same sightline. The goal is not to occupy every rooftop or room. It is to create a compact zone where teammates can see and support one another.
Quick deployment checklist
- Check the open middle for information before committing to the crossing.
- Clear close corners first when leaving an interior corridor.
- Use rooftops briefly, then change position after revealing yourself.
- Follow the changing respawn line instead of chasing one isolated target.
- Keep a fallback route so a grenade or crossfire does not trap your squad.
For larger-scale desert combat, continue with the Dust Royale V2 Battle Royale guide. For shorter arenas, compare Broken District and Compound.