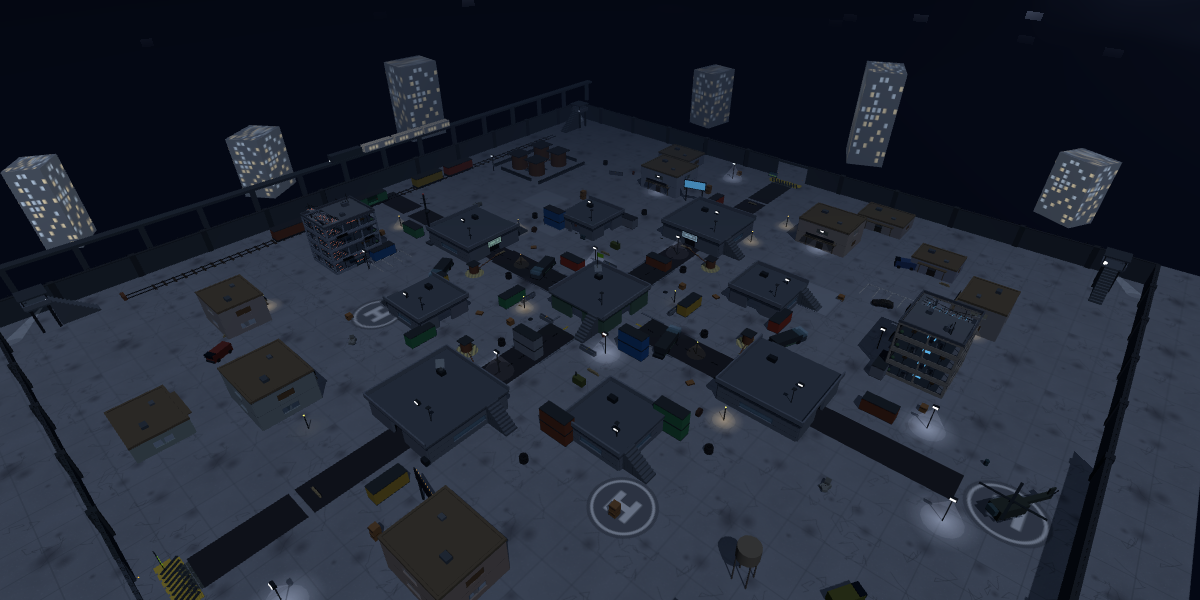
Compound is a layered defensive arena. The central bunker creates an obvious anchor, while corner structures, rail-side cover and exterior paths give attackers several ways to challenge it. Darkness reduces visual clutter but makes movement against bright surfaces easier to notice. Positioning between light and shadow is therefore part of the fight.
Control without becoming trapped
The bunker provides strong cover and useful connections, but owning it does not mean standing in the same room. Place teammates on complementary exits so one player can warn another about a push. If every operator watches the same lane, a perimeter rotation can collapse the position without resistance.
When attacking the bunker, avoid feeding through one entrance. Show pressure on one side, then use a second route while defenders adjust. Even a short delay between the two contacts can divide their attention. Once inside, check the nearest cover before aiming toward a distant exit.
Fight the lighting, not just the enemy
Night maps reward clear silhouettes. A player crossing a lit opening is easier to track than one moving against a dark wall. Pause behind cover to scan the brighter exit before entering it. When holding an angle, place the crosshair along the contrast line where a moving operator will first become visible.
Use the perimeter to reset
The outer routes are not only flanks. They are also recovery lanes when the center becomes crowded with grenades and automatic fire. Move around the pressure, regain ammunition and approach the next fight from a direction that teammates can support. A perimeter push becomes risky when it separates you from the minimap cluster for too long.
In Team Deathmatch, watch for the spawn line to flip as one side advances. A deep solo flank may place new opponents behind you. If teammates disappear from the nearby minimap, slow down, locate the new front and rejoin the closest pair.
Quick deployment checklist
- Cover different bunker exits instead of stacking one sightline.
- Scan bright openings from shadow before crossing them.
- Change position after gunfire reveals your silhouette.
- Use perimeter paths to reset, not to disappear from your team.
- Expect the respawn front to shift after a successful push.
For a brighter long-range arena, study Dust Fort. For faster close-quarters pressure, open the Broken District guide. The browser performance guide can also improve visibility and input consistency before a match.